Set up ScreenPal LTI v1.3 with Moodle
How to set up ScreenPal LTI v1.3 with Moodle
The ScreenPal LTI screen recorder integrates with many learning management systems. Use this article for the setup and use of our LTI v1.3 app within the Moodle LMS for administrators and teachers.
For information about how to configure the Moodle LMS with the older LTI version 1.1, go to this article instead.
Please note that while ScreenPal will continue to support the use of LTI v1.1 with ScreenPal, we will no longer be developing ScreenPal feature updates for this version.
 Important: If you are currently using the Screencast-O-Matic or ScreenPal LTI v1.1 tool, please read this Migration statement before upgrading to LTI v1.3.
Use of the LTI app is only supported for Team Business and Team Education plans.
Add the ScreenPal LTI 1.3 app as a Moodle admin
1. Login Moodle as an admin.
2. At the top of the page, click on Site Administration, then Plugins. Under External Tools, click Manage Tools to configure the ScreenPal app as an external app.
3. Under Add Tool, click configure a tool manually.
4. On the External tool configuration page, enter the following:
- Tool name: Enter a unique, identifiable name. We recommend entering Screenpal LTI v1.3.
- Tool URL: Enter https://screenpal.com/lti-1p3
- LTI version: LTI 1.3
- Public key type: Select Keyset URL
- Public keyset: Enter https://screenpal.com/lti-1p3/jwks/moodle
- Initiate login URL: https://screenpal.com/lti-1p3/login
- Redirection URI(s): https://screenpal.com/lti-1p3/launch
- Tool configuration usage: Select Show in activity chooser and as a preconfigured tool
- Select the checkbox next to Supports Deep Linking (Content-Item Message)
- Click the Show more link to display additional fields and for Icon URL, enter https://screenpal.com/images/sp_icon.png
5. Expand the Services section and select the following:
- For IMS LTI Assignment and Grade Services, select Use this service for grade sync only.
- For IMS LTI Names and Role Provisioning, select Use this service to retrieve members' information as per privacy settings.
- For Tool Settings, select Use this service.
6. Expand the Privacy section and select the following options:
- For Share launcher's name with tool, select Always.
- For Share launcher's email with tool, select Always.
- For Accept grades from the tool, select Always.
- Select the checkbox for Force SSL.
7. Click Save changes.
Connect LTI v1.3 to your ScreenPal account
1. In Moodle, on the Manage tools page, locate the ScreenPal LTI v1.3 tool again.
2. Click the View configuration details icon.
3. Copy and save the following values for use in ScreenPal:
- Platform ID
- Client ID
- Deployment ID
- Public keyset URL
- Access token URL
- Authentication request URL
4. Open a new browser tab and log into ScreenPal as a Team Owner or Team Admin.
5. From the navigation menu on the left, click Settings.
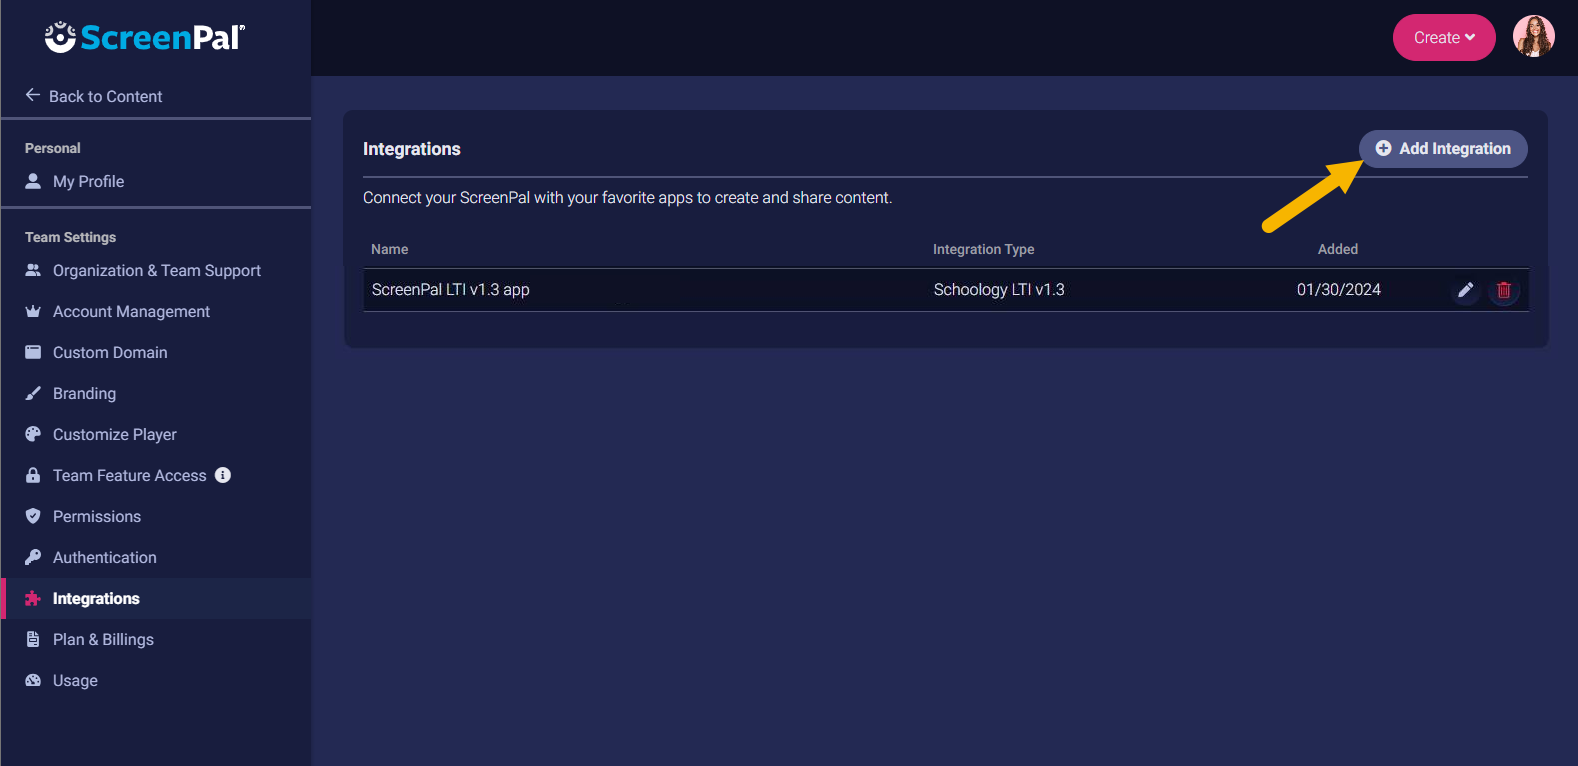
6. From the Settings area, click Integrations.
7. Click the Add Integration button in the top right corner of the page.

7. Click the Add Integration button in the top right corner of the page.
8. For Integration Name, enter a unique name for the Moodle integration. For example, enter Moodle LTI v1.3.
Please note that you can have multiple LTI integrations, so the name for each one must be distinctive.
9. For Integration Type, select LTI v1.3.
This displays several additional fields.
10. For LMS Type, select Moodle.
11. For Deployment ID, enter the Deployment ID that you copied from Moodle in step 3.
12. For Client ID, enter the value you copied from Moodle in step 3.
13. Enter the following:
- Issuer - The Platform ID from Moodle, which typically matches your Moodle domain
- Auth / Access Token URL - The Access Token URL from Moodle (URL that ends in /token.php)
- Auth Login URL - The Authentication request URL from Moodle (ending in /auth.php)
- Key Set URL - The Public Keyset URL from Moodle (ending in /certs.php)
14. Click Save.

Note: Moodle does not support copying or duplicating a course while maintaining resource links. If you duplicate a Moodle course that contains a resource link for ScreenPal content, the child course will not display the same content as the parent course. For more information about this, see the article titled Duplicating Moodle courses with resource links.
Related Articles
Set up ScreenPal with Canvas using LTI v1.3
Add the LTI v1.3 app as a Canvas admin Our application integrates with many learning management systems via the Learning Tools Interoperability (LTI) standard. This article will help you with the setup and use of our LTI version 1.3 app with the ...Set up ScreenPal LTI v1.1 with Moodle
How to set up ScreenPal LTI v1.1 with Moodle The ScreenPal LTI screen recorder integrates with many learning management systems. This article will help with the set up and use of our LTI v1.1 app within the Moodle LMS for administrators and teachers. ...Resolve the "401 Unauthorized" error when using ScreenPal with the Moodle LMS
If you are using the ScreenPal LTI v1.3 application with a self-hosted instance of Moodle, you may encounter a "401 Unauthorized" error message when ScreenPal tries to synchronize data with your Moodle Gradebook. This can occur when a student ...Upgrade to ScreenPal LTI version 1.3 for D2L Brightspace
While D2L/Brightspace does support migration of some LTI version 1.1 integrations to LTI version 1.3, it will not successfully migrate external launch links for ScreenPal. ScreenPal LTI v1.1 links will continue to work and we recommend that you leave ...Upgrade ScreenPal LTI v1.1 to v1.3 for Moodle
Please note that there is currently no way to migrate older Screencast-O-Matic or ScreenPal links using the ScreenPal LTI v1.1 plugin to LTI v1.3. These LTI v1.1 links will continue to work moving forward. We recommend that you leave them in place ...